|
|
This page is devoted to autobody related items.
|
|
|
1996 Crown Victoria Police car
This Crown Victoria belongs to the Manchester Police Dept located in Manchester, MD. This car was hit by a blue Dodge minivan, which we just got done fixing (bondo work on the hood, bumper, absorber, radiator support bent, etc). Due to the lack of back up vehicles, they wanted their car back as soon as possible and my shop had the quickest *in and out* time around, why? Because my boss told the adjuster *we can straighten it* and that we did. |
|
|
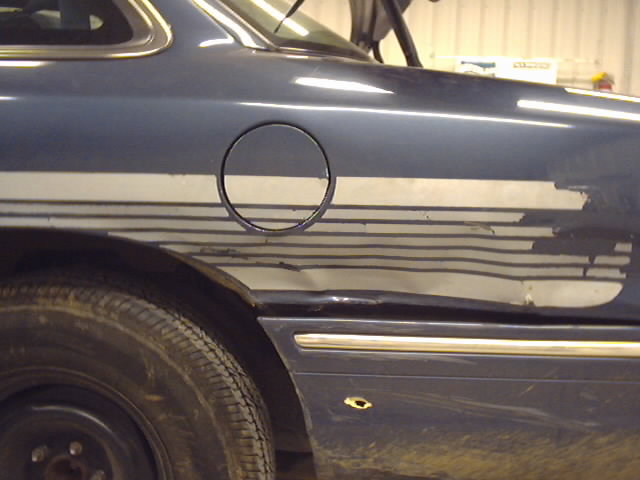
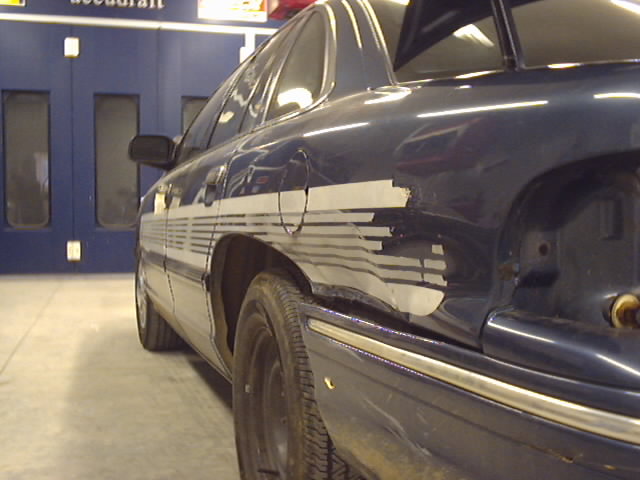
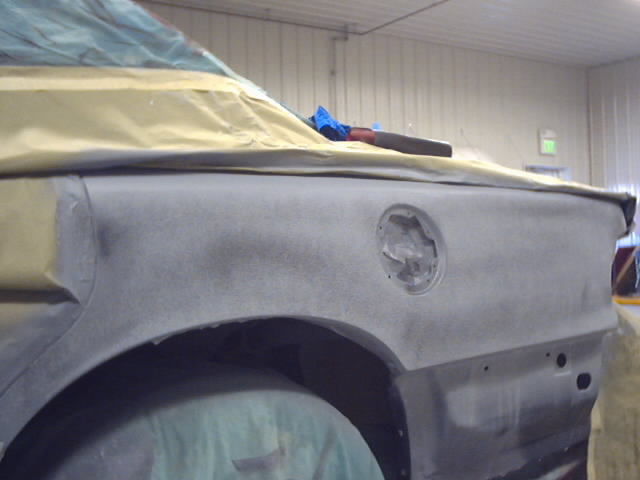
Heres a good picture of the extensive damaged done to the panel. By all means, this car should of recieved a new quarter, but Manchester police did not care what we did, as long as it looked ok when done. Was this repair possible you ask? Of course..
|
|
|
After further investigations, we noticed the inside structure was damaged as well. So my boss straightened that out for me, his weapons of choice was a Porta Power, 6 foot steel bar and blocks of wood. How professional, i know.... After he got the majority out, I went to town. A lot of studs, shrinking and hammer and dolly work was used to massage the panel into tolerance for bondo. |
|
|
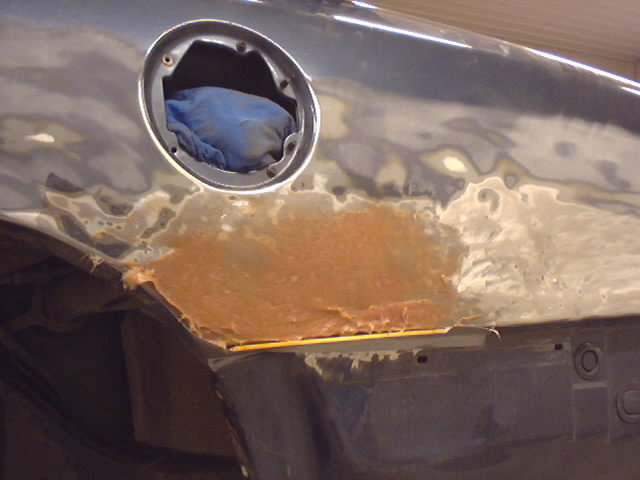
Whats this mysterious red substance? Its U-Pol's Figra-glass fiberglass filler with kitty hair. This stuff is very strong, easy to work with and is easy to apply. Due to its strength, I used this in the lowest spots to help fill the area faster, plus its a lot stronger than having a thick amount of bondo here. Take notice of the surrounding paint, Its all featheredged. This is one of the many things im picky about, and its the area preperation before bondo. I always feather edge ANY paint that bondo will touch, even if its underneath the bondo. Bondo preperation is just as important as paint preperation. One of the many things misunderstood and overlooked in the Autobody field.
|
|
|
Its a bird, its a plane, its bondo! After many layers of bondo, this is what im left with. My starting grit was 36, then 80, then 100, then 180. Its a habbit my boss does not like, and thats finishing bondo with 180. Then in the surrounding paint I use a little bit of 320, then 400 then 500. |
|
|
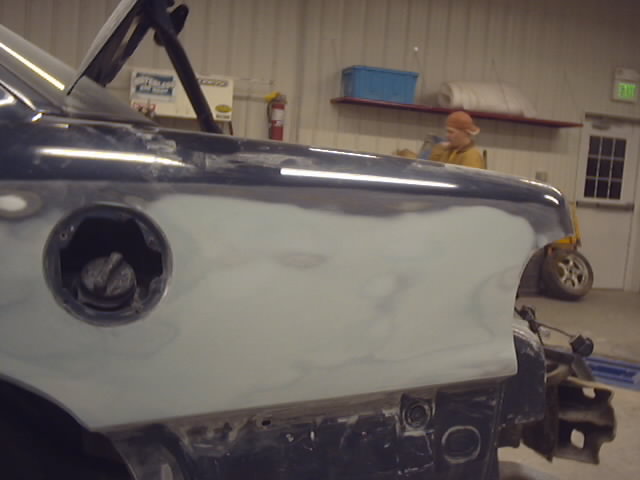
My boss used U-Tech's grey primer surfacer, as he uses that on mostly everything. Its really nice cheap primer. This are sat over night and a heat lamp was also used as a curing source so any major shrinkage would happen now and not later. Due to the repair size, I started block the middle with 220, then worked my way out with different grits. When blocking with coarse grits, I try to stay away from the edges to prevent burn throughs. So everytime I went to a finer grit, I worked my way out. Also, after block with 220, then 320, I sprayed a black guide coat over the area, this showed me every little imperfection, any lows, coarse scratches, etc. I really love this method for my final grit (500 wet). I hate dry sanding, wet with dawn dishwashing liquid works great.
|
|
|
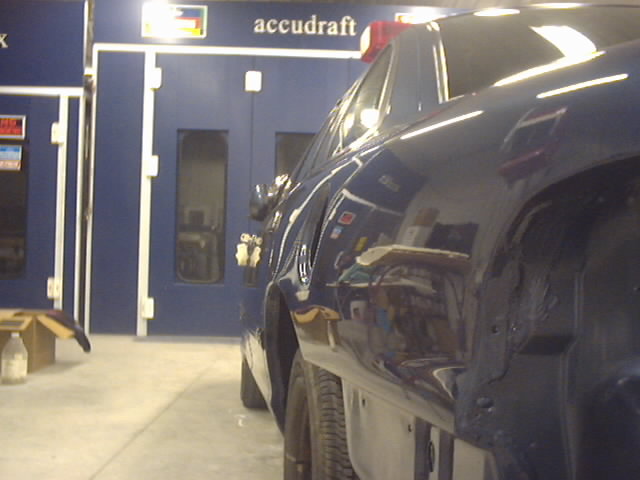
Ah their she is. Im very proud of myself, their are no waves, goudges, or coarse scratches in the paint anywhere. Ever metallic is flat and even, its beautiful. Usually blocking is my biggest problem, I struggle with it and Id rather not do paint prep, but, im willing to learn anything and everything possible. This took us about 4 days and we were given one week to complete it. Only problem is that we are waiting on parts, a hub cap and bumper trim. But overall, the outcome was very good and yes, that badly damaged quarter panel was possible to fix, and that we did. |
|
|